 Video on Patreon
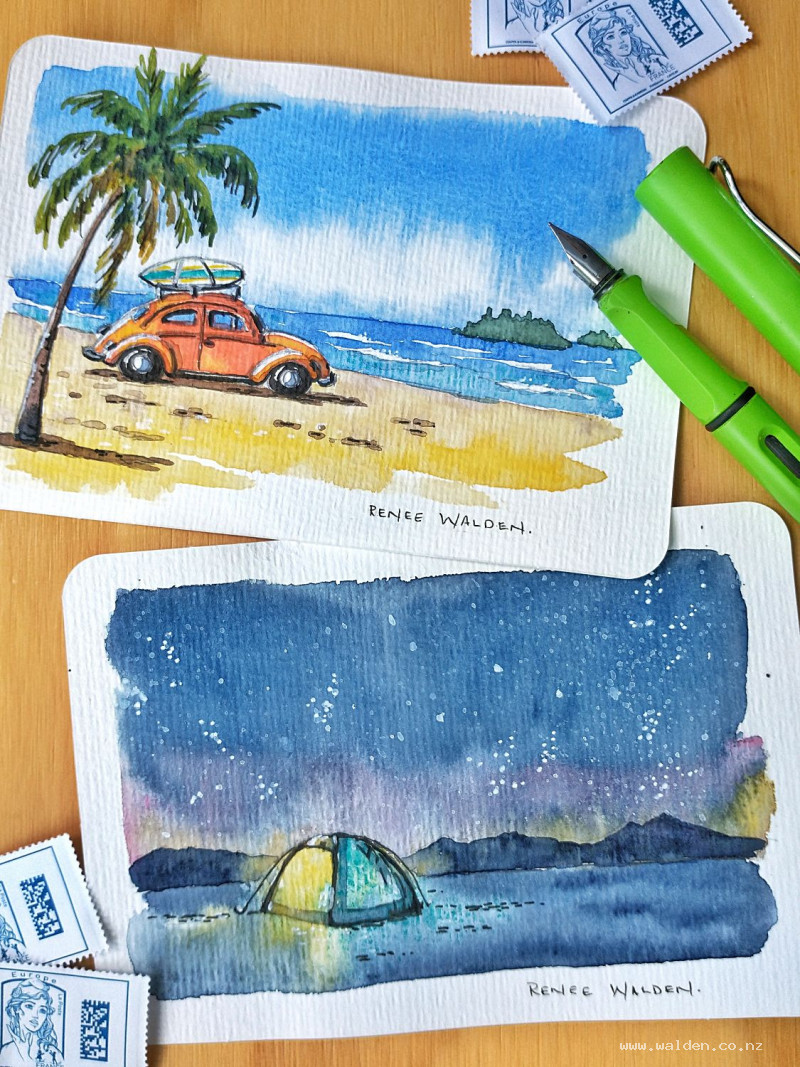
Two summer postcards
9 November 2022
Video - Level ◆◆◆
When last did you send a handmade postcard? In this lesson we paint two - a beach scene and a mountain scene, so you can surprise someone and make their day :-)
Happy painting!
Video run-through...
About This Painting
Two hand-painted postcards — a glowing tent under a starry mountain sky, and a vintage VW Beetle with a surfboard at the beach. Each is small enough to mail, and the lesson covers both from start to finish. Paint one or both depending on which suits the people you're sending to.
Before mailing, give the finished postcard a light spray of acrylic varnish to protect the watercolour.
Reference drawings are available in the lesson description for both compositions.
Postcard One: Tent Under a Starry Sky
The Pencil Drawing
The drawing is provided dark enough to trace, so lighten it with a kneadable eraser before painting — the tent glows from within and you don't want pencil lines showing through the warm light. Lighten enough to still see the lines, but remove any heaviness from the marks.
The Sky
Wet the entire sky area, extending the water right down over the mountain shapes so they receive a soft blue undertone. Mix four colours: a golden yellow (cadmium yellow hue) for the horizon glow; a pinky violet (pyrolin violet or permanent violet) for the mid-sky; quinacridone rose for a pink band; and a deep night-sky mix of ultramarine, phthalo blue, and Payne's gray for the upper corners. Mix the dark colour with plenty of pigment despite the water — it will dry much lighter than it looks wet.
Working wet-in-wet, drop in the yellow first along the horizon (cleanest brush first to avoid contaminating the pale colour), then the violet, then the pink, letting them blend freely. Fill the upper corners with the very dark mix and push more pigment in than feels necessary. Retrieve any yellow glow that gets lost by lifting a clean area and dropping it back in while still wet. Allow to dry naturally — don't hairdryer. The colours will continue moving and settling.
The Tent and Foreground
Wet the entire foreground area. Drop in a warm yellow glow at the front of the tent and let it bleed softly into the wet foreground. On the opposite side of the tent, drop in a small amount of turquoise for contrast, letting it also bleed out. Darken the foreground edges with the same deep sky mix, keeping the central glow warm and light. Allow to dry.
Paint the tent body using the warm yellow glow colours, keeping the front face brightest. The dark mountain silhouettes are painted with the sky's dark mix — keep edges interesting and craggy, varying the roofline. The foreground becomes a dark base anchoring the scene.
The Stars
Once everything is dry, add stars using white gouache and an old toothbrush. Load the bristles sparingly — test on scrap first to check the size of the drops. Stars cluster rather than scatter evenly; concentrate them in the darkest areas of the sky. Once the fine splatter is done, pick out a few larger individual stars with a white Posca marker or gel pen dot.
Pen and Ink Work
Use dark brown ink with a fine nib for the shadow sides of the tent structure, the mountain edges, and any foreground detail that needs sharpening. Use a white gel pen for the brightest highlight edges of the tent and any star points that need emphasis. Keep pen work restrained — the soft, glowing washes are the main event.
Postcard Two: VW Beetle at the Beach
The Sky and Sea
Wet the sky area and drop in a light, warm blue — keep it simple and bright to suggest a sunny day. The sea below uses the same blue with horizontal strokes, leaving small white gaps for wave movement. Add the sandy beach with a very dilute warm yellow-ochre wash, leaving the lightest areas for the brightest sand in sunlight.
The Palm Tree
Paint the fronds wet-in-wet using a range of greens — sap green, green gold, and a touch of blue for depth. The fronds droop and overlap; vary the colour within each one. The trunk is painted with sepia, darker on the shadow side and at the base where it meets the sand. While the sepia is still on the brush, add a few soft marks in the sand for footprints, pebbles, or driftwood — keep these grouped rather than scattered evenly.
The VW Beetle
Paint the body in pyrrole orange (or your chosen colour), leaving tiny slivers of white paper on the edges and surfaces most directly facing the sun — bumper tops, the back of the bonnet — to suggest shiny metalwork. While still wet, drop in cadmium yellow light on the sunlit sides to exaggerate the roundness of the body panels. The Beetle's curved forms mean a gradual light-to-shadow transition rather than a hard edge.
Paint the surfboard in a contrasting colour (turquoise with yellow stripes works well). Add the shadow cast by the surfboard onto the roof once dry.
For the chrome bumpers and hubcaps, mix a gray from the sky blue and a touch of sepia. Apply a thin shadow on the right side of each, leaving the left side as white paper or very pale wash. For the shadow under the Beetle itself and the shadow of the palm tree on the sand, use the same sepia and blue mix, making it dark enough to anchor both firmly to the ground.
Pen and Ink Work
Use black ink for the tyres, working carefully around the left edge to preserve a highlight that makes the rubber look shiny. Use dark brown ink for all other shadow-side details on the Beetle: the running board, door seam, bonnet lines, roof racks, surfboard straps, and the right-hand side of the palm trunk. A few rings on the trunk and a couple of frond marks are enough — don't cover the brushwork. Keep all dark pen marks on the right-hand side and underneath; nothing on the sunlit left side.
Use a white gel pen (finer than a Posca marker at this scale) for highlight edges on the left-hand side of the body, the surboard, the waves, and to restore any white areas that were lost. Sign and varnish before posting.
Resources...
* Drawing to trace
* Reference photo
* Reference photo
* Drawing to trace
* Reference photo
Join me on Patreon
Join my Adventures in Colour Tier for $16 to access this post and my full library of over 200 others including deep-dive videos and step-by-steps.