 Video on Patreon
Zebras
24 May 2026
Video - Level ◆◆◆
If you saw any of my posts from my recent holiday in South Africa, then you probably know that animals featured quite a bit. I so enjoyed doing little sketches of the beautiful animals we saw, that I'm inspired to repaint many of them as larger paintings.
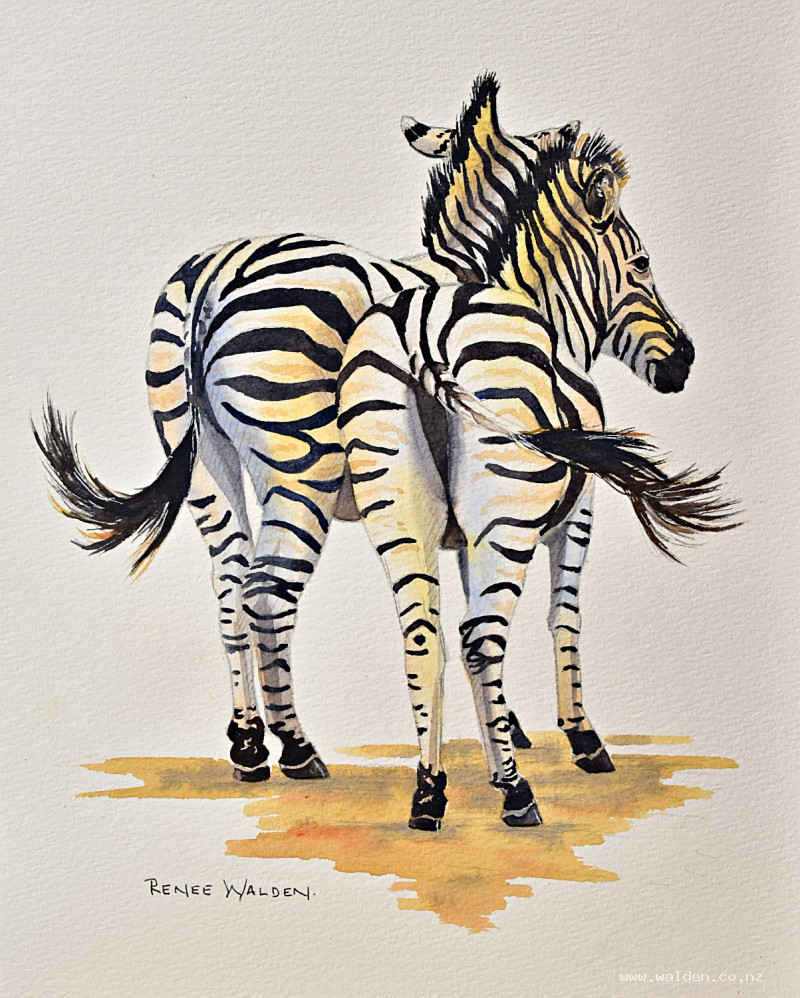
I'm inviting you to paint these zebras with me. Cheekily from the back, it's a different pose to normal, which makes them really interesting I think.
This is not a difficult painting - one single wash to establish the form and colour changes on the body, then stripes on top. It's true that you need to get the drawing correct and that the stripes take a while, but you can always trace the drawing and enjoy just the painting part.
Happy painting!
Video run-through...
About This Painting
Two zebras painted from behind — a cheeky, unusual angle that shows off their stripy rumps, swishing tails, and just enough face to anchor the composition. Despite looking black-and-white at first glance, zebras are dusty, warm-toned creatures with cool blue shadows, and getting those subtle colour shifts right is what makes them look alive. The washes are kept relatively simple, so a careful drawing does a lot of the structural work here.
A traceable drawing is available in the lesson description.
The Pencil Drawing
Because the painting relies on relatively simple washes rather than heavy layering, a detailed drawing is especially important. Start with the overall outline — zebras are essentially horses — then add the stripes, making sure they follow the curve of the body rather than running straight across. The stripes wrapping around the barrel, the neck, and under the throat are what give the animal its three-dimensional form. Once the stripes are in, add light hatching to mark the darkest shadow areas.
Lighten any pencil lines in areas that will stay pale before you start painting.
Colours to Prepare
- Ultramarine — well diluted, for the cool bluish undertone in the shadow areas
- Natural sienna (or yellow ochre / raw sienna) — very light, for the warm sunlit sides
- Quinacridone sienna (or burnt sienna) — very well diluted, for the warmer reflective light around the belly and legs
- Payne's gray or ivory black — for the stripes and darkest areas
Mix ultramarine and natural sienna separately and keep them apart on the palette — combined they produce a muddy greenish-gray. Swatch them side by side to see what to avoid.
First Wash: Warm and Cool
Wet both zebras entirely, working over the pencil lines, eye, and into the tails. Check from the side for any dry patches and re-wet as needed — the wetter the paper, the more time you'll have to work and the softer the colour transitions.
While the paper is wet, drop in your three colours, keeping the warm sienna tones on the sunlit sides, cool ultramarine in the shadowed areas, and quinacridone sienna around the belly and lower legs where warm ground light reflects up. Keep everything very light — you're building a luminous undertone, not colouring in. Let all the edges be soft and the colours bleed into each other naturally.
Let dry completely.
Painting the Stripes
Work on both zebras at the same time so they stay consistent. Mix a warm, rich dark — not a flat black, but something with Payne's gray, ultramarine, and a touch of brown or sienna to warm it.
Apply the stripes with a medium brush, following the curves of the body. Vary the colour as you go: bluer in the shadow areas, slightly warmer and browner on the lit side. Don't use a tiny brush — a medium one gives more expressive, varied marks. Leave the white areas unpainted.
Keep the stripes slightly irregular and follow the reference carefully, but don't try to be perfectly exact. Wetting each stripe slightly before painting can help the edges stay soft where you want them.
Mane and Face
The mane runs from the top of the head down the neck and is made up of short, upright hairs — untidy and varied in length and direction. Paint with a fine or dagger brush, varying the colour between black, warm brown, and gray. Use the same approach for the tail roots.
For the face, a cool dark eye and simple nostril are enough. Keep pen work minimal to preserve the freedom of the washes.
Hooves and Lower Legs
The area just above the hoof is the darkest part of the leg — mix a near-black and apply with a clean brush, lifting a little highlight on one side while still wet. The hooves themselves are slightly worn and not pure black at the front edge. Between the dark hoof and the leg markings, leave or suggest a thin, dirty cream stripe — if it gets lost, a white gel pen will recover it.
Lighter Brown Stripes
Once the dark stripes are fully dry, add the subtle warm stripes that sit between them — these are most visible on the rump and hindquarters, less so around the head. Mix natural sienna and a touch of quinacridone sienna with a lot of water. The marks should be barely there, just enough to break up the plain white gaps and add a sense of the body's surface. Don't draw them in first; paint them freehand so no pencil line shows through.
Tail Swishes
Paint the tails wet-into-wet, starting with the dark colour at the root and shifting to a blue-gray, then a warmer brown toward the ends. The movement and energy of the tails is a major feature of the composition — take your time here and let the colours separate naturally. A slightly looser, wetter approach works well.
The Ground
Keep the ground simple — just enough to place the animals on something solid. Mix natural sienna and quinacridone sienna, well diluted, and lay a loose horizontal wash below the hooves. Add a slightly darker shadow directly under the feet and belly. The shape of the ground should echo and respond to the shapes above it.
Final Details
Use a dagger brush, rigger, or fine brush to add a few extra hairs around the tail and mane — these should vary in colour and direction, and look intentionally loose. A white gel pen picks up the brightest highlights on the mane, ear edges, and lower leg stripe. Keep pen work to a minimum — the painting has life and movement and heavy inking will flatten it.
Step back, compare to the reference, and resist fussing. When the painting looks like it's moving, it's done.
Resources...
* Reference photo
* Drawing to trace
Join me on Patreon
Join my Adventures in Colour Tier for $16 to access this post and my full library of over 200 others including deep-dive videos and step-by-steps.