 Video on Patreon
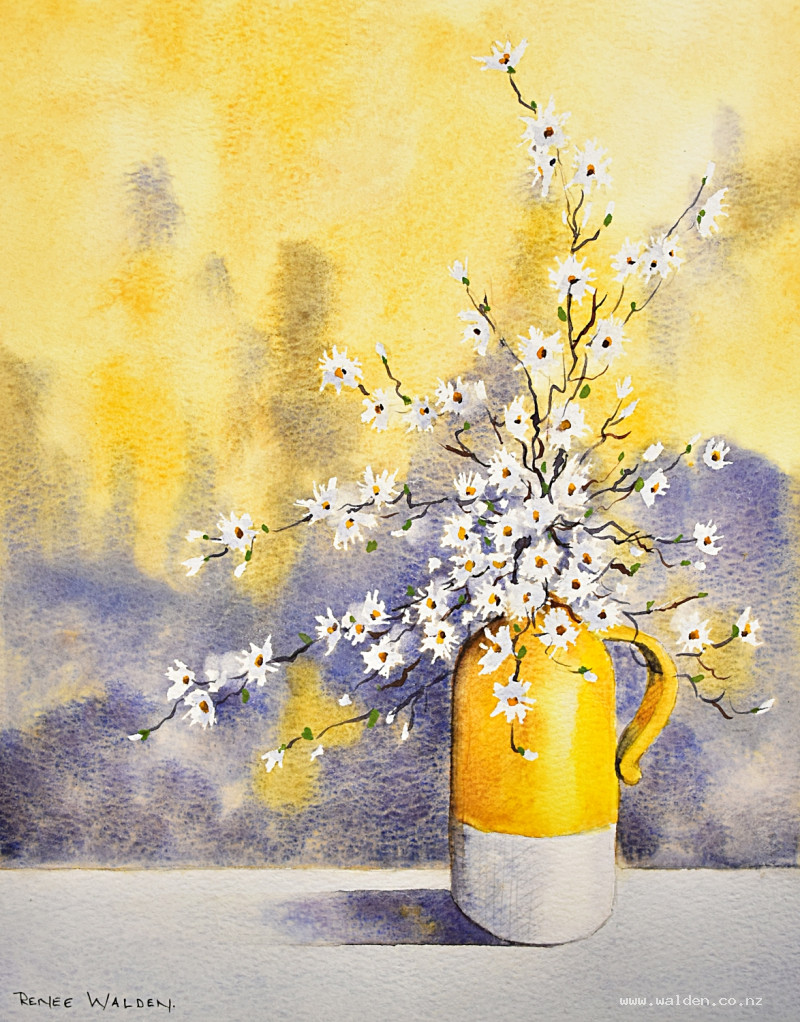
Vase with white flowers
18 June 2026
Video - Level ◆◆◆
Here's a deceptively simple painting delivers maximum impact for minimal effort — a wet-in-wet background and a limited palette do most of the work, while the result glows with light and looks far more skillful than it actually is to paint. You've got this!
Once the groundwork is laid with a simple drawing and a bit of masking fluid, the rest comes together fast: a big, loose wet-in-wet wash behind the flowers, a restrained palette, and the painting is nearly finished before you know it.
This large vase of flowers sat on a windowsill of a cafe in the beautiful town of Saint-Cirq-Lapopie, France — impossible to walk past without noticing. I know several of my students stopped to photograph it too; it was clearly a painting waiting to happen. I sketched it as a small vignette in my travel sketchbook, alongside a larger study of one of the town's pretty alleyways, but I loved it so much I knew I wanted to paint it again properly, full-size, with you.
No complications here — just jump straight in.
Happy painting!
Video run-through...
About This Painting
A pot of spiky flowers spotted at a café in the French village of Saint-Cirq-Lapopie — very French, very shabby chic. The palette is beautifully limited: a warm mustard yellow runs through the vase, the flower centres, and the background, while everything else is painted in neutral blue-browns and grays. The composition is built around a backward C-shape of branches, with the vase placed off-centre to give it movement. Masking fluid protects the flowers while the background washes go in, making the whole process quite relaxed.
A traceable drawing is available in the lesson description.
Composition note: Start with the vase positioned higher in the frame and less table below it than you might instinctively draw — see the end of the lesson for why, or simply use the provided drawing.
The Pencil Drawing
Draw the vase first, using a vertical centre line to keep it symmetrical. Place it off-centre on the page. Then add the branches as loose, twiggy squiggles — aim for a backward C-shape that creates movement through the composition. Finally, scatter flower shapes throughout: vary their angles so some face up, some sideways, and some toward the viewer, with a cluster near the pot. Optional hatching can mark the shadow areas if you'd like a guide.
A traceable version is provided if you'd prefer to skip the drawing and focus on the painting.
Masking the Flowers
Once the drawing is done, mask all the flowers with masking fluid before any paint goes on. The flower shapes are spiky stars — use an old drawing pen or ruling pen to pull the masking fluid into points. Alternatively, drop a small blob of masking fluid and drag it outward with a toothpick or skewer. Vary the flower angles and let some touch each other. Let the masking fluid dry completely before painting — it should feel non-tacky and look transparent.
Colours to Prepare
- Mustard yellow — Raw sienna or Monte Amiata natural sienna works well; add a touch of yellow if it needs more glow. This colour runs through the vase, the background light, and the flower centres.
- Blue-gray — French ultramarine mixed with quinacridone sienna (or burnt sienna). Mixing two colours rather than using tube gray allows you to vary the temperature and creates more interesting granulation.
- Green — Any favourite green for the leaves and buds; used sparingly.
Mix generous quantities of both the mustard and the gray — the background is a large area and running out mid-wash is frustrating.
The Background Wash
Wet the entire background thoroughly, using a flat brush to cut around the vase and tabletop shapes. Check from the side for any dry patches and re-wet — the more water on the paper, the more time you have and the softer the transitions will be. Tilt the board slightly to help the water flow.
Drop the mustard yellow into the upper area where the background light hits, and the blue-gray into the lower and darker areas. Let the colours merge softly. The goal is a gradated wash that moves from warm and light at the top to darker and cooler below, with a sense of backlight behind the flowers. Work quickly and don't fuss.
Let dry completely.
The Vase
Wet the vase and drop in the mustard yellow, keeping it lighter on the side catching the light and deeper toward the shadow side. Add some of the blue-gray into the shadow side while still wet, letting the two colours blend softly. The vase should feel rounded and luminous rather than flat. Leave a thin highlight strip on the brightest edge.
The Table
The table is painted in the same neutral gray used in the background, keeping it lighter near the top and slightly darker at the front edge. A soft shadow underneath the vase anchors it to the surface. Keep the table simple — it's supporting the composition, not competing with it.
Removing the Masking Fluid
Once everything is thoroughly dry, remove the masking fluid by rubbing it away with a clean eraser. The flowers will appear as crisp white shapes. Stand back and assess the composition before moving to the next stage.
The Flower Petals
The revealed flower shapes will be stark white — paint each one with a light wash that gives them some dimension. Keep the colour pale and varied: warmer where they catch the light, slightly cooler in shadow. Some petals can stay almost white; others may have a hint of the background colour reflected into them. Don't overwork this — the masking has done the hard work of preserving the shapes.
Branches and Twigs
Using a dagger or rigger brush, paint the branches that connect the flowers, working from the pot upward. Use the dark blue-gray mixture for the shadowed branches and introduce some warmer brown into others to vary the colour. Hold the brush toward the back and let the tip do the work, keeping the lines squiggly and organic. Stand back regularly — it's easy to overdo the branches and pull focus from the vase.
Flower Centres
Each centre is painted in the same mustard yellow as the vase. The key is placing each centre correctly according to the flower's angle: if the flower faces you directly, the centre sits in the middle; if it's at an angle, the centre shifts accordingly. Add a small shadow to the lower edge of each centre to make it feel round and three-dimensional. Work slowly here — this is a good place to pause and think before each mark.
Leaves
Add a few simple green marks for leaves and buds — far fewer than you might think are needed. A touch of a colour that appears nowhere else in the painting adds freshness without competing. When you feel the urge to add more, put the brush down.
Final Assessment
Stand back and look at the whole painting. Pen work is optional here — the washes are expressive and heavy inking risks tightening everything up. A white gel pen or a touch of gouache can lift the odd highlight if needed, but be conservative.
If the composition feels unbalanced — too much empty table below the vase — use masking tape to define a new lower edge and gently lift colour from the area below with a damp melamine sponge (the kind sold for cleaning walls). These are remarkably effective at recovering near-white from watercolour paper. Dry, assess, and tidy the new edge.
Resources...
* Reference photo
* Drawing to trace
Join me on Patreon
Join my Adventures in Colour Tier for $16 to access this post and my full library of over 200 others including deep-dive videos and step-by-steps.