 Video on Patreon
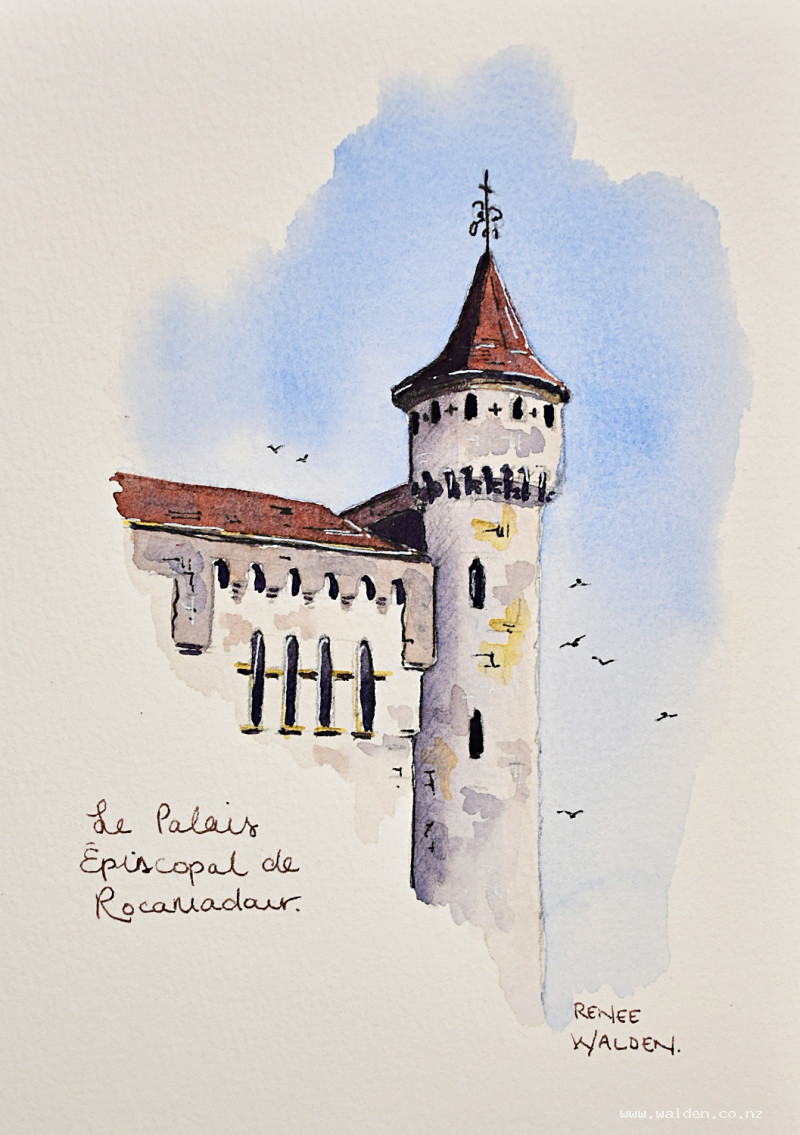
Episcopal tower, Rocamadour
25 June 2026
Video - Level ◆◆◆
Join me for a little Disney moment :-)
The place is actually real, though! This week we paint a tower in Rocamadour. It's a small sketch with a very limited palette, so the painting part doesn't take long at all. Spend a little time getting your drawing correct, or trace my drawing and have fun adding colour.
Happy painting!
Video run-through...
About This Painting
The tower of the Episcopal Palace in Rocamadour — a tiny, fairytale painting that's more about drawing than painting. The reference photo was taken on a gloomy day, but the painting imagines it in sunshine, which means cool shadows on the left and a bright cobalt sky. The palette is very limited: grungy blue-grays for the stonework, a warm reddish mix for the roofs, and cobalt blue for the sky. Most of the structure and detail comes from the drawing, so getting that right makes the painting stage quick and satisfying.
A traceable drawing is available in the lesson description.
The Pencil Drawing
This is where most of the work happens. Concentrate on the curves of the arches and the perspective lines — they need to be accurate because the painting relies on the drawing underneath to do much of the structural work. Once the outlines are in, hatching the shadow areas (all on the left-hand side) gives you a clear map to follow when painting and means you won't have to make decisions under pressure. The hatching is optional — you can mark shadows with paint alone — but it helps.
Trace the drawing if you'd prefer to focus your energy on the painting.
Colours to Prepare
- Grungy gray — ultramarine and quinacridone sienna (or burnt sienna) mixed with a lot of water. Make two or three variations: one roughly 50/50, one bluer, one warmer. These cover all the stonework.
- Roof color — the same two colors but more concentrated, with pyrrole red (or any warm red) added to push it toward a reddish terracotta. More intense than the stonework mix.
- Shadow color — the roof mix shifted bluer, for cool sunny-day shadows.
- Cobalt blue — for the sky. Mix a generous pool.
- Natural sienna — for a few warm accent details.
Stonework: First Wash
Paint the stonework areas with the diluted gray, varying between the warmer and cooler versions as you move across the building. Keep the right-hand side very pale. You can wet the stonework first and drop the colours in wet-into-wet, or simply swap between warm and cool as you paint. Watch the edges you create — this is a small vignette and the outer edges matter. Let dry.
The Roofs
Switch to the more concentrated roof mix — the richer and redder the roof, the paler the stonework will look by contrast. Use a smaller brush to work into the tight areas, dabbing the tip on a paper towel to shape it before each stroke. Once the base colour is in, drop a little extra blue into the mix and add it in places to weather and grunge the surface. Let dry.
Warm Accent Details
Before the shadows go in, pick out a couple of small architectural details — a thin line here, an edge underneath a ledge — in natural sienna. Keep this very minimal. Everything else will be handled by the shadows.
Shadows
Mix the shadow colour from the roof mix with extra blue until it reads as a cool, distinctly bluish tone. Shadows go on the left-hand side of every form: roof overhangs, arches, window recesses, and wall faces. Work wet so the granulating colours separate slightly, giving the shadows texture even at this small scale. Try using a slightly larger brush than feels comfortable — the looseness is worth it. Soften any curved edges (such as a rounded turret) by pulling the brush downward while the paint is still wet. Let dry.
Darkest Darks
Use the same shadow mix with much less water for the very darkest areas: window openings, archways, and deep recesses. Let the drawing guide you here — a good pencil drawing means you can work confidently and quickly. Start with the largest dark shapes first, then work down to the smaller ones.
The Sky
Paint the sky after the building, not before — that way you can judge exactly how light or dark the sky needs to be to complement what's already there. Wet the sky area first, planning the edge shape with water before any paint goes in. Aim for a vignette that frames the tower without cutting it off awkwardly.
Use cobalt blue, darker at the top and paler toward the horizon. Work carefully around the building edges to avoid a dry white halo. Let the wet paper do the blending.
Extra Stone Details
Once the sky is dry, stand back and decide how much extra texture the stonework needs. A few individual stones picked out in natural sienna or a slightly darker gray — softened before they dry — can suggest the large block construction without overworking the washes. Focus any extra detail on the tower, which is the main subject. Pause frequently and resist the urge to keep adding.
Check the tonal values: the top of the roof should contrast clearly against the sky.
Pen Work and Final Details
Use a fine pen sparingly, keeping the dark ink to the shadow side only. The washes should still do most of the talking — the pen is just there to tighten a few edges and reinforce the darkest lines. Watch that curves stay curved and perspective angles don't drift.
A white gel pen can lift a few highlights on sunlit edges.
A small pair of birds added with pen above the tower gives the building a sense of height and keeps the whole thing feeling a little bit fairytale.
Resources...
* Reference photo
* Drawing to trace
Join me on Patreon
Join my Adventures in Colour Tier for $16 to access this post and my full library of over 200 others including deep-dive videos and step-by-steps.