 Video on Patreon
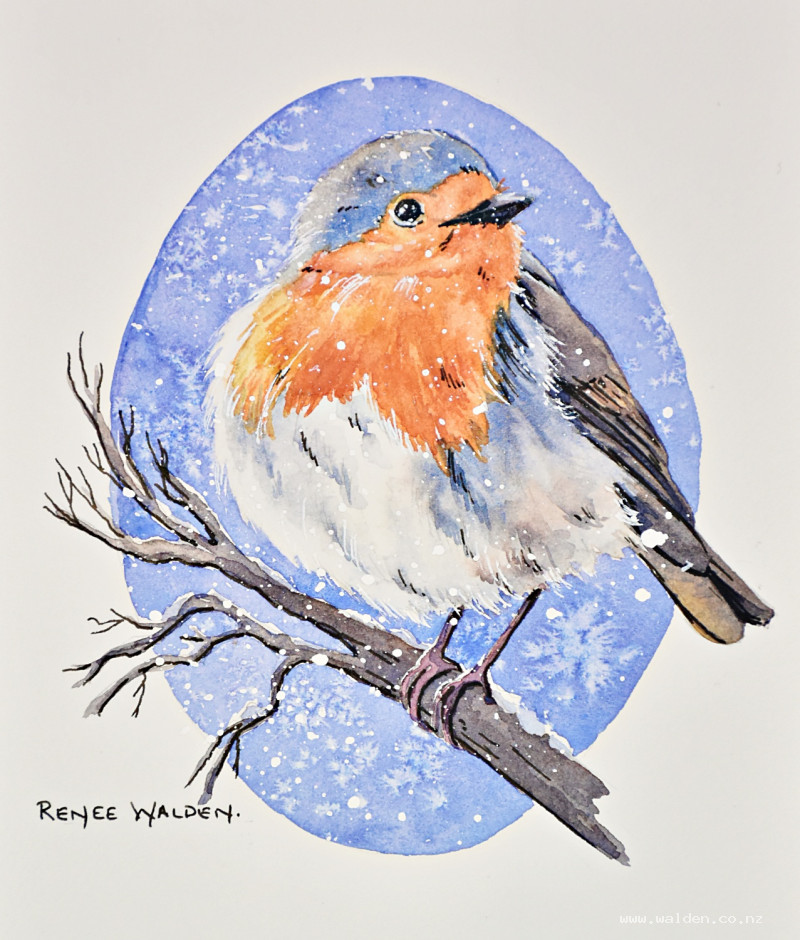
A robin in the snow
9 November 2023
Video - Level ◆◆◆
I'm going to say it! Christmas is coming!! So let's get a bit of head start by painting a cute, little, fluffy robin in the snow.
You can scan your finished painting and turn it into a Christmas card or paint is as an original to give to someone special.
I painted this one to match the deer in the snow that is a lesson from about a year ago. They'll look so lovely together.
Happy painting!
Video run-through...
About This Painting
A robin perched on a snowy branch, painted within an oval vignette — a companion piece to an earlier deer-in-snow painting that uses the same format and can hang alongside it or be scanned and printed as a Christmas card. The robin is fluffed up and chilly-looking, set against a soft purple-blue background with salt-created snowflakes and white gouache splatters for falling snow.
The bird is painted first in detail, then the background is painted around it, allowing negative painting at the feather edges. A careful pencil drawing does much of the structural work; the watercolour layers on top are relatively light.
You'll need white gouache, an old toothbrush for splattering, and table salt for the snowflake effect in the background.
A traceable drawing is available in the lesson description.
The Pencil Drawing
A detailed, accurate drawing of the bird is the foundation — with a transparent subject like a robin, a good pencil drawing means the watercolour washes on top don't need to do all the structural work. Draw in the direction of the feathers and note where the fluffed-out feathers break the silhouette edge; these will be picked out with negative painting later. Draw the oval vignette shape and position the bird and branch so elements break out of it. Lightly indicate the eye, beak, and feet.
Before painting, use a kneadable eraser to lighten the pencil line around the oval edge so it won't show through the finished painting. Also lighten any pencil in the brightest white areas — the sunlit edge of the chest, the highlighted back of the neck, and the small white patches on the belly.
Painting the Bird: Colour Plan
The bird's colours vary considerably across its surface. Mix: a blue-gray (ultramarine and quinacridone sienna) for the head and belly areas; a browner version of the same mix with more sienna for the warmer patches; quinacridone gold (or raw sienna) for the main orange of the chest; natural sienna as a mid-tone orange; and quinacridone sienna for the deeper, browner orange. The back and wing feathers are a warm brown — add this to the palette once the chest and head are underway.
Painting the Bird
Work with two brushes in hand throughout — a larger number 10 for laying in washes and a smaller number 4 for teasing colour into details and edges. Paint with a light touch; pushing paint firmly into the paper deadens the colour and kills texture. Work wet enough that colours can blend softly at their edges.
Paint all strokes in the direction the feathers lie — this matters more than it may feel like in the moment. When the paint dries, brushstroke direction is often visible, and feathers painted against the grain look unnatural. Small gaps of white paper are welcome; they read as sparkle and texture.
Start at the top of the head with the blue-gray, then vary to the browner mix at the back of the head. Move to the orange chest, varying between quinacridone gold (more yellow-orange), natural sienna (mid-orange), and quinacridone sienna (deeper brown-orange) across the surface — no flat single colour. Work the boundary between the orange and the gray belly carefully, letting the colours blend slightly at the edge. Add the brown back and wing feathers last, keeping variation in tone. Leave the smallest white areas unpainted for later highlights.
Shadow the feet where they meet the body and on the underside, using the brown mix with a small touch of pink. The beak base and the underside of the lower mandible should be slightly darker than the top.
Once the bird is fully dry, gently lift out any areas that should be softer — the back of the head blending into where the background will be, and any feather edges that are too hard. Use a barely damp old acrylic or cat's tongue brush with light strokes. Some edges should remain hard (the crisp individual feathers in focus); others should fade softly into the background. Add a small shadow wash in the purplish background colour beneath the snow on the branch — this makes the snow read as sitting on top of something rather than just being white paper.
Painting the Background
The background is a soft purple-blue — ultramarine with just a touch of permanent violet (which is very strong; use sparingly). This colour is the complement of the orange chest and makes it sing. The entire oval is painted in one wet-in-wet pass, so mix a generous amount.
Working quickly with the large brush for the broad areas and the small brush to tease colour around the feather edges and the branch, wet the oval area and drop in the purple-blue wash. Where the belly feathers break the edge of the bird's silhouette, use the small brush to paint the background colour into and around the individual feather tips — this negative painting is what creates the sense of fluffy, individual feathers catching the cold air.
While the wash is still wet, drop salt across the background. Salt needs to go in while the paper is genuinely wet — too late and there will be no effect. Each grain draws the pigment toward it, creating soft, fuzzy circular marks that read as blurred background snowflakes. Allow to dry completely and naturally before removing the salt.
Stars and Gouache Snow
Once the background is fully dry, brush away all salt crystals gently. Load an old toothbrush with white gouache (kept on a separate small palette, not mixed into the watercolour wells). Test on scrap paper first to judge the size of the spatter. Using the oval template as a mask to protect the area outside the vignette, splatter the gouache across the painting to create sharp foreground snowflakes. The combination of soft, blurred salt snowflakes in the background and sharp, crisp gouache flakes in the foreground creates a sense of depth and falling snow.
Pen and Ink Work
Use dark brown ink with a fine nib for the shadow sides: the eye (leaving a small highlight), the nostril, the base of the beak where it meets the feathers, the darkest shadow areas between feather groups, the shadow side of the feet and the underside of the branch. Keep the line work minimal — the goal is to sharpen, not to outline. Too much pen will undermine the soft, textured quality of the painted feathers. Work in the direction of the feathers, referring to the reference throughout.
Use a white gel pen for the highlight on the eye (a small dot of reflected light brings the robin to life immediately), along the top edge of the beak, and for any lost snow on the branch. If any snow areas need restoring, a fine brush with thick white gouache also works.
Remove the tape and sign.
Resources...
* Reference photo
* Drawing to trace
Join me on Patreon
Join my Adventures in Colour Tier for $16 to access this post and my full library of over 200 others including deep-dive videos and step-by-steps.