 Video on Patreon
Bougainvillea
11 April 2024
Video - Level ◆◆◆
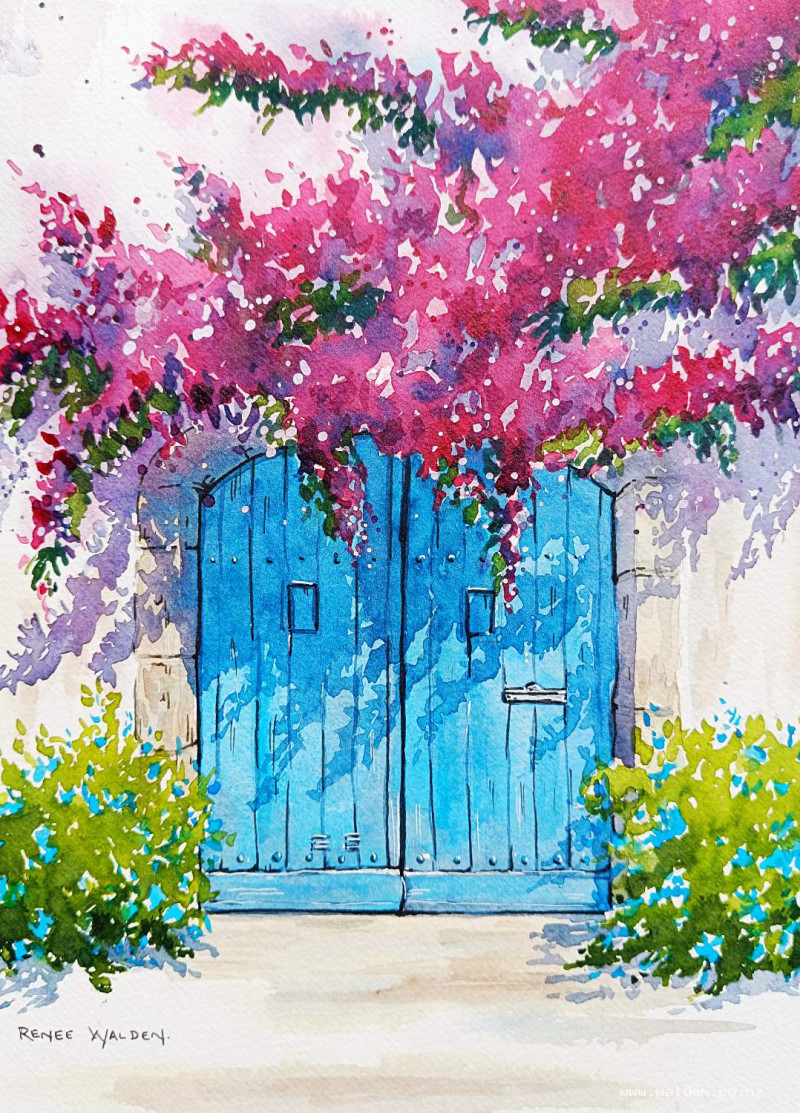
A riot of pink always makes me happy :-) Let's journey to somewhere on the Mediterranean to paint a very typical summer scene, a bougainvillea over a blue door.
There are number of elements to explore in this scene. We start by painting a splash of wet-in-wet pinks and purples behind the vine, then we add some wet on dry marks on top - this gives the bougainvillea a lovely sense of depth and the idea that there's a little movement. And we finish off with those beautiful shadows. In between there's the blue door and the little bushes in the front.
A thoroughly joyful painting, so I hope you enjoy the process as much as I did.
Happy painting!
Video run-through...
About This Painting
A sun-drenched Mediterranean doorway — perhaps Greece, perhaps southern France — framed by a cascade of pink bougainvillea. The composition centres on a single aged blue door with beautiful stonework surrounds, but the real joy of this painting is in the shadows: warm and pink-tinged on the pale walls, cool and blue on the door itself. The painting builds in layers, from a soft wet-in-wet haze of pinks and purples through to hard-edged petals, detailed stonework, and finally richly coloured shadows that pull everything together.
You'll need white gouache, an old toothbrush for splattering, brown ink with a fine nib, a white gel pen, and a white Posca marker (optional). A separate small palette for the gouache will keep it from contaminating your watercolour wells.
A traceable drawing is available in the lesson description.
The Pencil Drawing
The composition focuses on a single door rather than the full reference scene — the other windows are left out to give the bougainvillea more room to dominate. The flowers sweep diagonally across the upper part of the painting and spill off both edges, suggesting the vine continues beyond the frame.
Painting Order
Begin with the bougainvillea wet-in-wet wash, then the door, then the stonework, bushes, and ground. The bougainvillea petals with hard edges come next, followed by the shadows — first a broad pass, then a second darker pass for the deepest areas. Pen and ink work and splattering finish the painting.
The Bougainvillea: First Layer (Wet-in-Wet)
Rather than painting the flowers as a flat single pink, mix a range of pinks, purples, and a little blue to suggest the natural colour variation in a mass of flowers. Key colours: quinacridone rose as the main pink, a purple (ultramarine violet or permanent violet), and a touch of phthalo blue.
Wet the bougainvillea area with a spritz bottle and brush — not a solid wet sheet, but with gaps and variation in the water so the colours will spread unevenly. Drop the colours in loosely, following the diagonal sweep of the vine, and let them bleed and merge. Some areas should be denser, some gappier, to suggest depth and the sense of a breeze. Let this layer dry naturally without a hairdryer — forced drying stops the movement and can cause unwanted hard edges.
The Bougainvillea: Petals (Hard Edges)
Once the first wash is dry, paint individual petal clusters with harder edges on top. These sit in front of the soft background layer and create the sense of depth — the wet-in-wet wash reads as flowers further back, out of focus; the hard-edged marks read as the flowers closest to you. Work around the door area with more definition; toward the outer edges the flowers can remain softer.
The Door
Mix a rich blue from cobalt blue and cobalt turquoise (or substitute your preferred blue-green). Paint the door with vertical brushstrokes to follow the wood grain direction, and drop in Payne's gray wet-in-wet — heavier at the bottom where the door shows wear, and along the edges where hands have touched it. Leave a few small gaps of white to suggest worn or flaking paint. Paint around the postbox carefully. Dry thoroughly before moving on to the stonework.
The Stonework
Paint the arch and surrounds stone by stone, varying the colour between warm ochres, raw siennas, and cooler grays so no two adjacent stones read as the same tone. Leave fine white gaps between stones — these can be preserved by working carefully or reinforced later with a fine brush or pen. The stonework should feel solid and textured without becoming overworked.
Bushes and Ground
Paint the lower bushes and ground area loosely, keeping the values darker than the wall so they anchor the base of the composition. Vary the greens and add a little warmth to the earth tones in the foreground.
The Shadows
The shadows are the best part of this painting — take time with them.
The key things to consider: the light comes from the right, so all shadows fall to the left with a diagonal cast. The edges of bougainvillea shadows are spiky and broken, not smooth — include gaps and jagged edges even within the darkest areas to suggest the thorny, irregular vine. Vary the colour across the scene: on the pale wall, shadows are warm and pinky-purple (reflecting the flowers above); on the door, they become cooler and bluer; deepest of all at the top of the door where it tucks under the stonework arch.
Mix three colours: a warm purple for the wall shadows (quinacridone rose plus violet), the door blue mixed with Payne's gray for door shadows, and a little pink to drop in wet-in-wet for warmth. Work quickly with a medium or large brush, laying in the diagonal sweep of shadow with broken, irregular edges. Drop in the pink and blue variations while the wash is still wet. Stand back regularly to check the shapes are reading correctly. Let dry, then come back with a second darker pass for the deepest shadow areas — underneath the arch, where the two door panels overlap, and along the base.
Pen and Ink Work
Use brown ink with a fine nib to add definition in the shadow areas and around the stonework. Keep the marks broken and minimal — a few lines to tighten transitions, not a solid outline. Remember that shadows fall on the left, so ink marks should reinforce the left and underside of forms, never the right.
Final Details and Splattering
Splatter with pink on its own first for colour, then with white gouache mixed with a little pink for the flower centres. Cover the areas you want to protect and use an old brush or toothbrush to flick paint in random marks. Follow with a white Posca marker or white gouache and a fine brush for individual flower centre dots where more control is needed.
Add final highlights with a white gel pen along the brightest edges. Sign, dry, and remove the tape.
Resources...
* Reference photo
Join me on Patreon
Join my Adventures in Colour Tier for $16 to access this post and my full library of over 200 others including deep-dive videos and step-by-steps.