 Video on Patreon
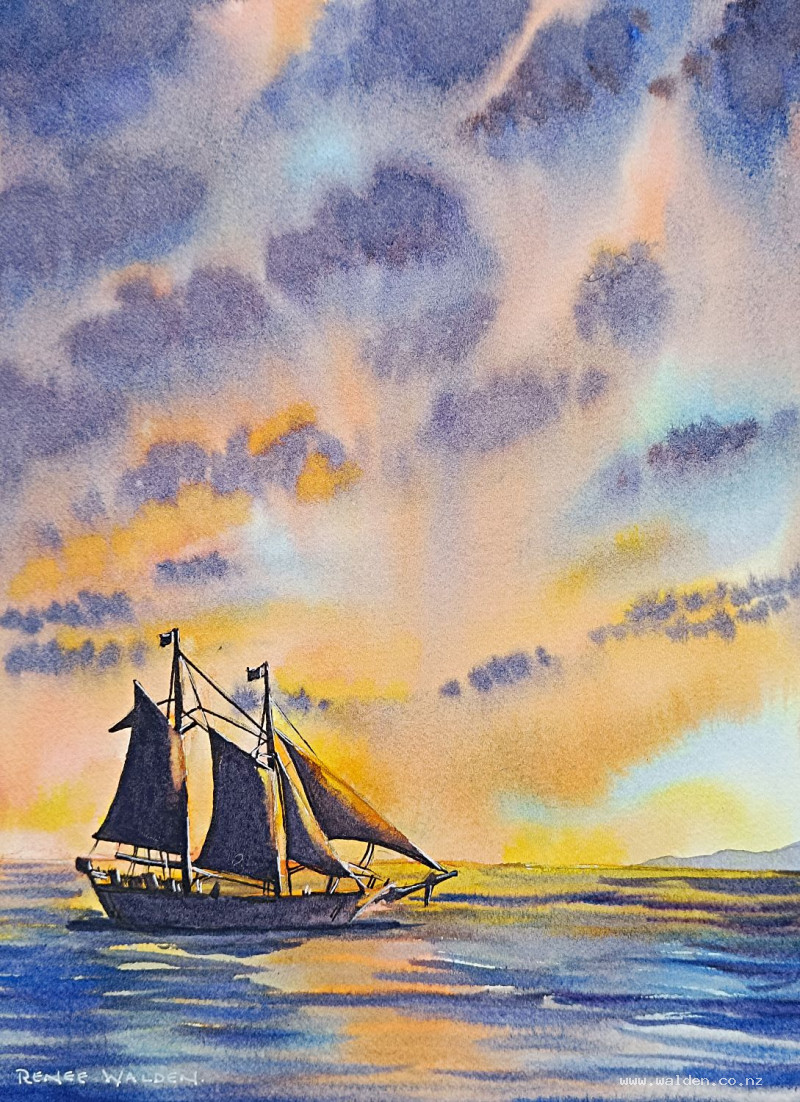
Ship at Sunset
4 July 2024
Video - Level ◆◆◆
It's been a while since we've painted a sunset, and this scene has a really big sky to add all the pretty colours to :-)
Not to mention a double masted ship in full sail and with lots of rigging for detail. That adds a rather romantic element, don't you think?
Happy painting!
Video run-through...
About This Painting
A tall ship in full rigging silhouetted against a sunset sky, with the same warm colours reflected in the sea below. Most of the painting is the sky — an exercise in mixing and placing multiple sunset colours wet into wet. The ship is added last as a near-silhouette with deliberate backlighting to make it more dynamic than a flat black shape. The rigging is finished with pen.
A traceable drawing is available in the lesson description.
Planning the Scene
The reference photo has a dark, murky horizon — this is worth brightening to make the sun feel present and active rather than already gone. The key painterly decision is the cloud lighting: in a sunset, the clouds are lit from underneath rather than on top, because the light source is at the horizon. This reverses the usual approach of lighting the cloud tops and shading the undersides.
The painting order is: sky first, then sea, then the small distant headland, then the ship. The ship goes on over a completely dry surface so it has sharp, clean edges against the glowing sky.
Mixing Sunset Colours
Mix all colours before wetting the paper:
- Cobalt blue (or cerulean) — pale, for the blue areas at the upper sky and horizon
- Hansa yellow medium and lemon yellow — bright, warm yellow for the sun-glow near the horizon
- Quinacridone rose mixed with the yellow — a warm peachy-orange for the undersides of the clouds catching the light
- Ultramarine blue, permanent violet, and quinacridone sienna — a rich, deep purplish-gray for the tops of the clouds in shadow
The purple-gray cloud mix should be genuinely dark and rich — dull it slightly with the sienna so it isn't too blue-violet. Make swatches to check all four colours work together before committing to the painting.
Painting the Sky
Wet the whole sky twice (once to saturate the fibres, once to create the working water layer on top). Include the area within and around the ship's rigging — the silhouette will cover it, so precision there is unnecessary. Keep the horizon line clean with a flat brush. Board at a slight angle.
Clouds in a sunset sky change character with distance. Clouds directly overhead appear as rounder, blobby shapes with more visible structure; clouds near the horizon appear as soft, horizontal streaks because we're seeing them from the side and they're far away. Use a round brush for the upper clouds and switch to a flat brush or horizontal strokes for the horizon area.
Working into the wet surface:
- Lay in the cobalt blue in the blue gaps between clouds, upper sky, and along the horizon edges
- Drop in the yellow along the lower horizon (the sun glow) — leave clear white areas for the brightest parts rather than painting right up to the edge
- Add the peachy-orange mix into the cloud underbellies — these catch the light and read warm against the cool purples above
- Drop in the dark purplish-gray for the cloud tops and shadow masses — these should be the darkest marks in the sky and placed with some weight, particularly toward the upper sky where we're closest to the clouds
Let the water carry everything. Don't pre-mix the sunset colours by swirling them together — place them in adjacent areas and let them bleed naturally at their edges.
While still wet, use a barely damp brush (absolutely no dripping water) to lift soft streaks in the lower sky area, suggesting haze near the horizon.
Let dry naturally. The cloud edges continue to soften as they dry, and halting this with a hairdryer freezes them mid-movement.
Painting the Sea
The sea reflects the sky directly below it. The same colours appear in the water, but darker and applied with entirely horizontal strokes — no diagonals, no blobs.
Work wet into wet across the whole sea area, starting with the horizon end and moving toward the foreground. Use the same palette:
- Blue along the horizon and in the cooler areas
- Yellow where the sun reflection hits the water — a bright streak leading toward the viewer from the sun's position
- Orange-pink for the warmer mid-water areas
- Dark purplish-gray for the larger wave shadows, in horizontal strokes that get larger and more spaced-out as they come forward
As the paint begins to dry slightly, the strokes become more defined and less blurry — this is correct for the foreground water, which should have more texture and contrast than the distant horizon area.
The Headland
A very diluted version of the purplish-gray mix, barely tinted, blocked in loosely with the biggest brush. It should read as a pale, almost hazy shape — distant land that exists to give the ship somewhere to be going. The slight yellow glow from the sky underneath makes it look appropriately lit.
The Ship: Silhouette with Backlighting
Once the sky and sea are completely dry, paint the ship. Mix an extremely dark version of the same purplish-gray-brown used for the cloud shadows — add considerably more quinacridone sienna to bring it close to black while retaining some colour. Test on scrap paper: pure black from a tube looks like a hole in the painting; a near-black made from mixed colours has depth and colour.
Work from left to right. For each sail and mast shape, block in the body of the shape with the dark mix, then while the paint is still wet, switch to the other brush loaded with yellow (and a touch of the peachy-orange) and drop it in along the right-hand edge and top of each shape. The yellow bleeds slightly into the dark, creating a luminous backlit glow. This is the key effect that lifts the silhouette from a flat black shape into something with atmosphere and dimension.
The sails on the sun-facing side get more yellow; those behind others get less. The hull catches some yellow along its front edge. A small cast shadow on the water beneath the hull anchors the ship to the sea.
Pen Work
Black ink (not brown — brown reads as warm and slightly jarring against the cool ship tones) in an extra-fine nib for the rigging: the standing rigging lines, the running rigging, the spars, the flags. These fine lines are what transform the painted shapes into a recognisable tall ship. Work freehand rather than with a ruler — perfectly straight lines read as mechanical against the expressive washes. Vary the weight of each line; some rigging lines are heavier ropes, some are fine sheets.
Turn the pen upside down for the finest lines. Take time with this stage — there is no rush here and the accumulated detail of the rigging is satisfying to place.
A few touches of white gel pen for the brightest highlights: tops of the sails where they catch the sun, any highly reflective fittings. Use it very sparingly and with care — there is no other true white in the painting, and white marks that are too bright will look grafted on rather than part of the scene. A yellow marker can be a subtler alternative for warm-light highlights.
Sign, remove the tape.
Resources...
* Reference photo
* Drawing to trace
Join me on Patreon
Join my Adventures in Colour Tier for $16 to access this post and my full library of over 200 others including deep-dive videos and step-by-steps.