Negative Painting
Define the light by painting the dark around it
What is negative painting?
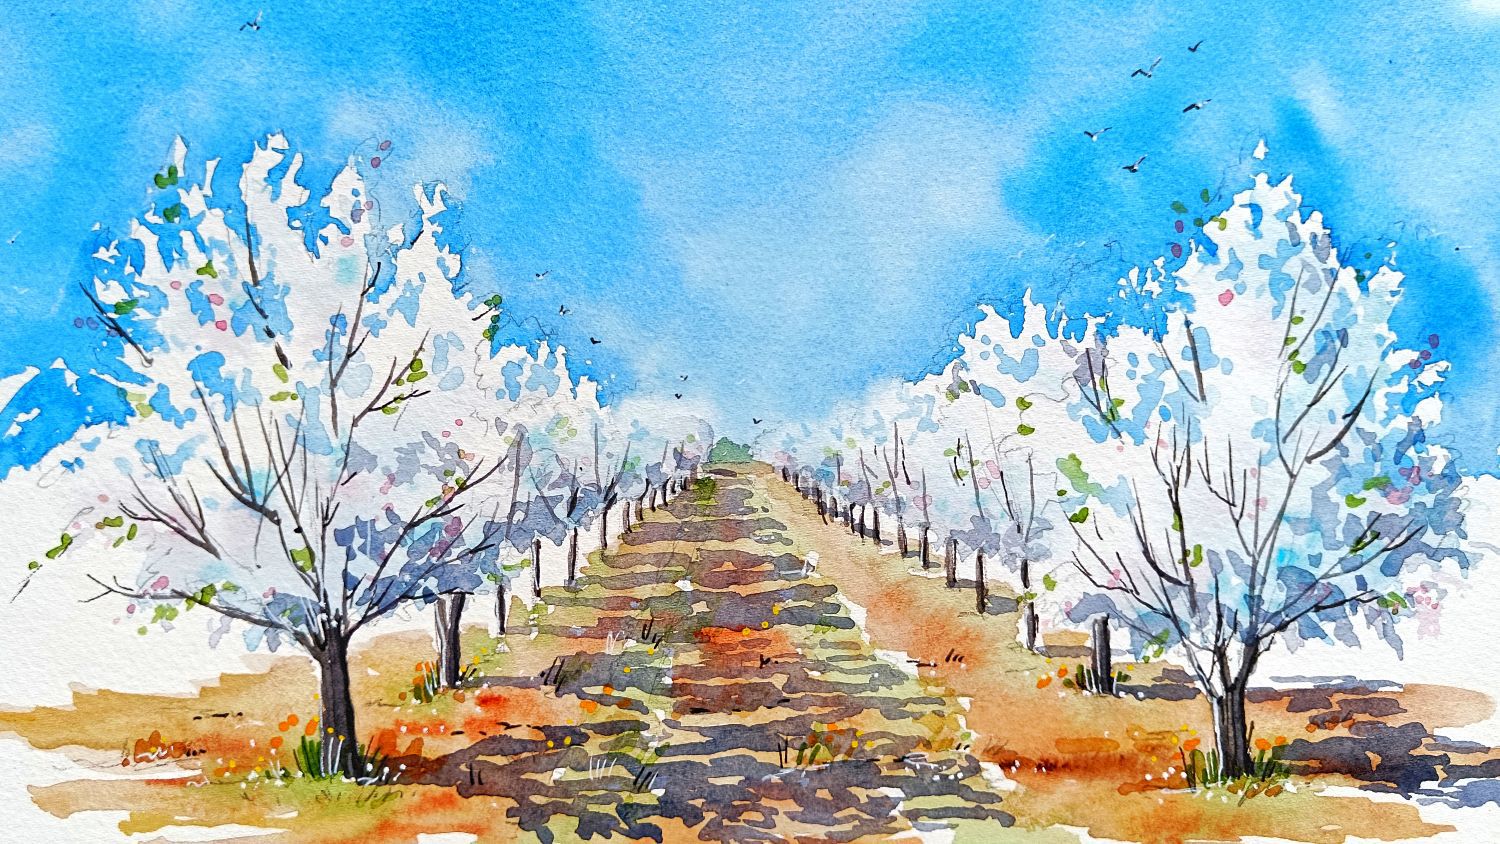
Most painting is positive: you paint the object itself. Negative painting reverses this — you define the object by painting what surrounds it. In watercolour, where white cannot be added on top, this is how light shapes, pale flowers, foam, and bright edges are preserved.
The skill is learning to see the negative space rather than the positive shape. Instead of "there is a white flower here", think "there is dark background on all four sides of this flower". Paint the dark, and the flower is revealed.
This shift in thinking takes practice. A useful exercise: look at any subject and deliberately identify the shapes of the spaces between things rather than the subject itself. The gap between two branches, the shadow between petals, the dark water between reed clumps — these are your brushstrokes, not the branches, petals, or reeds.
Negative painting in layers
Multiple passes of negative painting create depth. Each pass pushes the previous shapes backward into space and brings new, closer shapes forward.
How layered negative painting works
- First pass: the most distant shapes — paint loosely around vague distant forms using the palest, most diluted mix
- Second pass: once dry, paint a slightly darker, more defined layer around mid-ground shapes — this pushes the first layer back
- Third pass: the foreground — the darkest, most specific negative shapes, with the clearest edges
Each successive layer is darker, more defined, and sits closer to the viewer. The lightest, softest areas read as furthest away; the darkest, sharpest negative spaces sit in the foreground.
The rule: each pass must be darker
If a second pass is the same tone as the first, the depth disappears — the layers merge visually into one flat surface. Each pass must clearly step down in value. Mix the next layer darker than feels necessary; it will dry lighter than it looks wet.
When to use this
Layered negative painting is particularly powerful for reed clumps by water, overlapping foliage, multiple rows of white flowers, or any subject with clear foreground/mid-ground/background structure. It's also the method for building the illusion of depth in a dense flower painting — the background flowers fade back through progressively lighter negative space, and the foreground flowers emerge from the darkest surroundings.
White flowers and pale shapes
White flowers, foam on waves, pale architectural details, and any light shape against a dark background are all preserved using the same approach: the background colour is worked carefully around the pale shape, and the shape itself remains as white paper throughout.
Technique
- Draw the pale subject accurately first — you're committing to these shapes before any paint goes down
- Wet the background area, cutting carefully up to the edges of the pale subject
- Drop in the background colour — work right up to the shape's edge using the tip of the brush
- The background defines the shape: a clean sharp edge reads as a well-lit surface; a softened edge reads as a lost edge in diffuse light
- Vary edges deliberately — some hard, some softened — so the subject doesn't look cut out
The background colour for white shapes
Keep it rich and dark close to the white shape — this contrast is what makes white read as truly white. A pale background next to a pale subject produces no contrast and no luminosity. The darker the surrounding negative space, the more the white glows.
Using a small brush to cut in
Where a large brush is used for the open background, switch to a smaller pointed brush to navigate the tight edges around your reserved shapes. The large brush does the speed work; the small brush does the precision work. Move between them without stopping — so that the paper stays wet throughout.
Waves and foam
The white foam and spray in a wave or shoreline scene can be created entirely through negative painting — the dark water around the foam defines it. No white paint is used; the foam is reserved white paper throughout.
Approach
- Plan the foam and spray shapes before applying any paint — these cannot be recovered once colour goes down
- Work the dark water or wet sand around the foam shapes, not over them
- The leading edge of each ripple or wave is defined by painting the darker wet sand immediately behind it in negative
- In spray areas, leave irregular, organic white spaces within the painted dark — these read as flying droplets
- Keep some foam edges soft (where spray dissolves into air) and some hard (where water mass is compact and heavy)
The shadow step
Negative painting alone produces flat, paper-white foam. The step that makes foam read as three-dimensional mass is adding very dilute shadow marks within the white areas — a pale blue-grey dropped into the underside of foam, or faint dots and dashes within spray. This suggests that the foam has volume, weight, and density, rather than being a flat cut-out shape.
Stonework: negative painting for mortar
Mortared stonework is negative painting applied to architecture. The mortar is the background — painted as the overall wash. The individual stones are the positive shapes defined within it.
- Mix ultramarine and quinacridone sienna (or any blue with any brown) for a warm, complex grey — apply wet so the two colours separate naturally
- While still wet, drop in individual stone shapes — darker than the mortar, varied in size and colour
- The mortar dominates: the stones sit within it, defined by the negative space of the mortar around them
- Don't paint every stone — suggest a selection and let the viewer's eye complete the rest
In foliage and trees
The same principle applies to painting foliage. Rather than painting individual leaves, paint the dark spaces between leaf clusters — the shadow between groups, the dark gap between one branch and the next. The foliage shapes emerge from these negative spaces. This is why negative painting and wet-into-wet are the two main approaches for distant trees: the eye reads the shapes you've carved out as form, not the colour you've applied.
Masking fluid as planned negative space
Masking fluid is a way of preparing negative space in advance — reserving white paper before any wet wash goes down, allowing the brush to move freely over the entire surface without losing the reserved areas.
Key rules
- Apply with a cheap brush — masking fluid destroys bristles. Coat the bristles with soap first to make clean-up easier
- Let it dry completely before painting over it — at least an hour. Wet masking fluid will destroy any brush that touches it
- Remove it only when all surrounding paint is fully dry, so that you don't tear or damage your paper — peel gently with a finger or soft eraser
- The edge left after removal is always hard — plan for this. If a soft edge is needed, soften the dry area after removal using a damp brush
- Use can use masking fluid for the sun in a backlit scene, for fine stems and stalks in a loose wet painting, or for complex pale shapes you cannot paint around freehand
Masking fluid vs. painting around
Masking fluid gives a harder, more mechanical edge than painting around freehand. For organic subjects — flower petals, mushroom caps, soft cloud edges — painting around is often preferable, because the slight human irregularity reads as more natural than a perfectly preserved shape. Use masking fluid when there are many small shapes to protect (dandelions in a field, stars in a sky) or when you need to apply a fast, loose wet wash over a large area.