White Subjects
There is no white paint — only shadow, reflected colour, and trust
The fundamental principle
White in watercolour is the paper itself. There is no white paint that works very well — white gouache sits on the surface and looks chalky; opaque whites break the luminosity that makes watercolour special. The only true white is the paper you haven't touched.
This means the whole white surface — a mushroom cap, a flower petal, a wave's foam crest, a snowman, a seagull's back — must be constructed from what it isn't: from the shadow on one side, the reflected colour underneath, and the lost edge where bright light dissolves the boundary between subject and sky.
Resist the urge to add colour to prove the painting is working. Most students paint the shadows on white subjects too dark too early because the white paper looks empty and they feel compelled to fill it. Trust the white. The shadow is added carefully and last.
Reading white objects: the three colour zones
White objects in real light are never a single tone. Look carefully at any white subject and you will find three distinct colour zones — each caused by a different quality of light hitting the surface.
1. The shadow side — cool
The side turned away from the light source receives only ambient sky light, which is cool and bluish. Shadows on white objects lean towards blue or purple — never towards warm grey, which reads as dirty rather than shadowed. Example mix: ultramarine with a tiny touch of quinacridone rose, well diluted. Very pale. Shadows on white subjects are much lighter than you might expect.
2. The lit side — warm or bare
Direct sunlight is warm. Where the surface faces the light source most directly, it often carries the faintest warm tint — or no paint at all, just the bare paper. The lit side of a white flower petal or mushroom cap, for example, should be as clean and unpainted as possible. Resist adding colour here.
3. Reflected light — the colour of the surroundings
Whatever surrounds a white object bounces light back into the shadow areas. A seagull standing on golden sand picks up warm ochre on its belly. A white mushroom in autumn duff picks up warm sienna on its underside. A white building in a red-brick courtyard reflects a warm glow. This reflected light is what makes white subjects feel embedded in their environment rather than floating in front of it.
Shadow mixes for white subjects
Resist a ready-made grey for white subject shadows — it looks flat and dead. Mix the shadow from at least two pigments so they can separate on the wet paper and create visual life.
Three example mixes
- Cool shadow (shadow side): ultramarine blue with a tiny touch of quinacridone rose — a blue-purple grey. Very diluted. This is the coolest, palest mix.
- Warm forming shadow (transition zone): the same mix with quinacridone sienna added — a warmer, slightly neutral grey for areas between shadow and light
- Reflected warm light (underside): quinacridone sienna dominant with a touch of ultramarine — the warmest mix, used where surrounding colour bounces back into the shadow
Wet-into-wet within the object
For rounded subjects (mushroom caps, flower petals, eggs, the belly of a seagull), wet the entire surface first before adding any colour. Drop the cool shadow in on the shadow side, let the water carry it, then bring the reflected warm colour in from the other side. The two mixes will blend softly in the middle, producing the gentle gradation that reads as a curved, rounded surface. If you paint these onto dry paper, the boundary will be hard and the form will look flat.
Lost edges on white subjects
A lost edge is where the contour of a pale object simply disappears — where the light is so strong that the boundary between subject and background merges. On a white mushroom cap, a white flower petal, or a seagull's back, the upper or brightest edge often dissolves completely into the surrounding light.
Lost edges are not accidents to be corrected. They are a deliberate tool: they make a white subject look as though it is genuinely glowing, absorbing so much light that it has no visible boundary. A hard edge all the way around makes a white subject look cut out and pasted on; lost edges make it feel like part of the light.
How to plan and create lost edges
- Identify the lost edges before painting — where is the light strongest? Mark these spots mentally (or with a light pencil note)
- Use a kneadable eraser to remove the pencil line from those areas before starting — a hard pencil line under a white area looks very wrong and cannot be recovered
- When painting the surrounding background, simply leave those edge areas unpainted — the background colour stops short of the edge, and the subject and background share the same white of the paper
- Alternatively, bring the background colour up to the edge and then immediately soften it with a clean damp brush, pulling the edge colour out so it gradates to nothing
- On the shadow side, keep edges present and defined — the contrast between lost edges in the light and found edges in the shadow is what creates the sense of a three-dimensional form
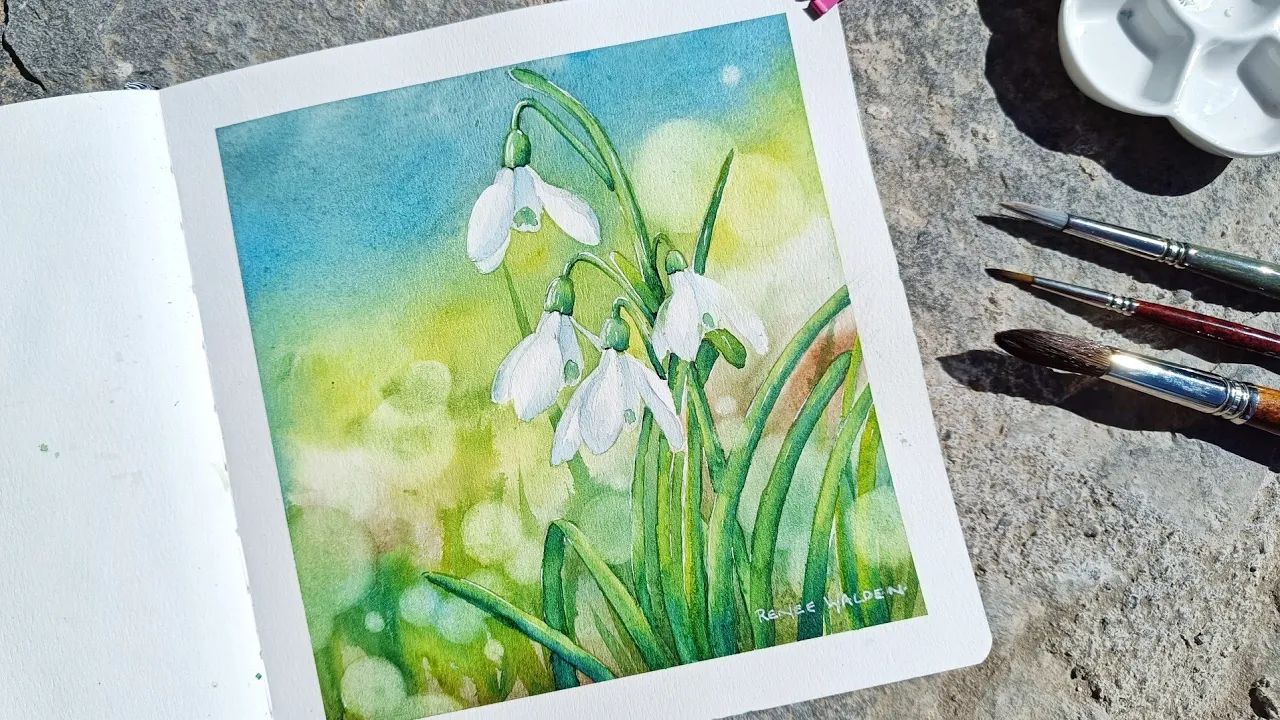
White flowers
White flowers are the classic white subject challenge. The petals are not white — they are a complex arrangement of shadow, reflected colour, warm glow, and bright paper. They just look white because you know they are.
Approach
- Draw the flower accurately — the petal shapes, their overlaps, the direction of each fold
- Establish a rich, dark background using negative painting — the richer the background, the whiter the flower reads
- Wet individual petal sections and drop in the coolest, palest shadow on the shadow side — leave the lit face completely bare
- Add the shadow between overlapping petals — this is what separates them from each other and gives the flower its form
- Add any reflected colour last — a touch of green from nearby leaves, or warmth from the centre, dropped in while the shadow is still damp
The centre
The centre of a white flower — the stamens and disc — is often the warmest, most saturated area of the painting. Cadmium yellow, quinacridone gold, or a warm orange, used confidently, anchors the flower and provides the complementary contrast that makes the surrounding white petals look even whiter. Don't be timid with the centre.
White animals and birds
White animals — seagulls, swans, sheep, white horses, the pale belly of a humpback whale — follow the same principle as white flowers but with the added complexity of form. The surface isn't flat; it curves in three dimensions, and the shadow must follow that curve.
Key observations
- Read the actual colours: a seagull looks grey-and-white, but close observation reveals purplish shadows on the underside, silver-grey wings, reflected warm ochre on the belly. Noticing these separates a living bird from a flat symbol
- The belly reflects the ground: whatever the animal stands on or floats above reflects back into the underside shadow. Sand reflects warm golden. Grass reflects green. Dark water reflects cool blue. Always include this
- Feathers, wool, and fur: the soft texture of white animals means some edges are naturally lost — individual feathers dissolve into each other, fleece has no hard boundary. This softness is an asset; lean into wet-into-wet for the body and add detail only in the focal area
Snow
Snow is one of the most common white subjects in watercolour — and one of the most often painted wrongly. The usual error is leaving snow as completely unpainted white paper throughout, which produces no form, no depth, and no atmosphere. Snow is never a flat white; it is a mass, and a mass has light and shadow.
Snow shadows
Snow shadows are almost always cobalt blue or ultramarine blue — sometimes with a touch of permanent violet, but always cool and always leaning blue rather than grey. Never use a warm shadow mix on snow; it reads as dirty rather than cold. Apply shadows as a single, well-loaded wash across shadow areas, softening some edges where the snow curves and leaving harder edges where it is compacted or has a sharp boundary.
Reflected light in snow shadows
This is the most commonly missed step: snow is highly reflective, and warm colour from surrounding objects bounces back into the shadowed snow. The snow alongside a red barn will pick up the faintest warm glow in shadow. Snow beside an orange autumn leaf may show a subtle reflected warmth along its edge. Drop quinacridone sienna or natural sienna into the shadow wash while still wet, and let it merge softly. The resulting shadow is richer, more interesting, and more true to life than a flat blue wash.
Snow on branches
Snow settles on the upper surfaces of horizontal branches and in crevices — not uniformly on all sides. White gouache applied to these upper surfaces works better than reserved paper for fine branch snow, as the branches themselves are too narrow to paint around. Use white gouache sparingly; it is noticeably brighter than the warm cream of the paper and will look out of place if overdone.